

A blurry interface screenshot creates a tempting promise: make it larger and the details will return. An AI photo enhancer can produce a larger image, but the new pixels do not automatically become trustworthy evidence of a label, menu state, error code, or product feature. The right decision depends on what the source recorded and what the article asks the screenshot to prove.
A pixel-origin test separates three jobs that are often confused: making a small but legible capture easier to display, improving presentation around an interface, and attempting to recover information that is already absent. Only the first two belong in a routine publishing workflow.

Diagnose Why The Screenshot Looks Soft
Softness can enter at capture, export, upload, or display. Identify the stage before changing the image. A screenshot taken in a low-resolution remote session needs a different remedy from a clean source compressed by a publishing system.
Check The Capture Before The File
Open the original at 100 percent. If text is sharp there but soft in the article, the publishing system may be compressing or resizing it. Re-export at the destination width, use the platform’s recommended format, and avoid repeated download-and-upload cycles. Editing the pixels is unnecessary when delivery created the defect.
Find Out Whether Detail Ever Existed
If a label is unreadable in the original, there is no verified wording for an upscaler to reveal. Return to the software and capture the state again. For a historical interface that cannot be reopened, describe only what remains visible and avoid quoting uncertain text.
Check browser zoom, operating-system display scaling, virtual-machine resolution, and remote-desktop quality. Each can soften type before capture. Repeat the screenshot at a native scale when possible. A clean new capture costs less review time than repairing every letter later.
Compare Three Routes Before Generating Detail
| Route | Use it when | Reject it when |
| Fresh capture | The interface can be reopened | The state no longer exists |
| Simple resize | Source text is already legible | Compression artifacts dominate |
| AI upscale | The image illustrates layout or appearance | New detail would be treated as factual copy |
The fresh capture is usually strongest because it preserves live interface text. A simple resize may be enough for a small but clean source. Upscaling earns a place when readers need a clearer overall view and the caption does not claim that newly rendered edges recover exact information.
Use The Destination As The Test
Export each viable route at article width, retina width, and mobile width. Compare the button hierarchy, cursor position, selected tab, badges, and code or command text. A larger file that creates haloed letters or invented separators is worse than a smaller honest capture.
Run the comparison in the real article template. A content column may shrink an upload, while a mobile layout may crop the right edge. If readers need a dense panel, provide a full-size source or split the tutorial into two focused captures instead of forcing one wide screenshot into every slot.
Test the platform’s saved output, not only the local preview. Reopen the published draft and compare it with the prepared file. Some systems create several responsive versions, so inspect the image delivered at a common mobile width as well as the desktop version.
Keep Interface Facts Outside Generated Pixels
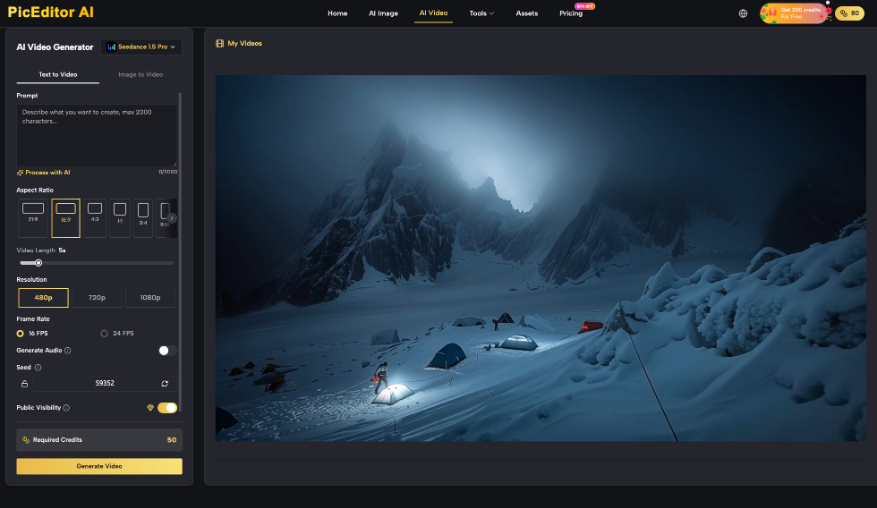
PicEditor AI offers an upscaling path that accepts common image files and lets the user choose a resolution before generating. Use it after the source diagnosis, not before. Keep critical UI wording in the article body, caption, or live annotation so a reader can verify it without trusting generated letter shapes.
Protect Every Region That Shows State
A selected toggle, disabled control, notification count, version label, or timestamp can change the meaning of a tutorial. Mark those regions before processing. Compare the result side by side and reject any candidate that changes their state, even when the alteration looks like a plausible interface improvement.
Separate Cosmetic Cleanup From Product Documentation
Removing a desktop notification outside the app may be a bounded privacy edit. Removing an in-app warning is a factual alteration. Extending a neutral margin for a crop may be acceptable. Inventing the hidden half of a dialog is not. The same pixels can be decorative in a marketing graphic and evidentiary in a bug report.
Add arrows, boxes, and step numbers only after the image route is approved. Check that each marker points to the same control at mobile size. An arrow that covers a status badge or merges into the interface makes the tutorial harder to follow.
Check Code And Commands As Live Text
Never rely on enlarged screenshot pixels for a command, path, API value, or code sample. Put the exact string in a code block or paragraph readers can copy. The screenshot can show location and context; live text carries the executable fact. One invented hyphen can turn a harmless example into a failed setup.
The same rule applies to error messages. Quote the verified message in live text and use the screenshot to show where it appeared. If privacy cleanup removes an account name or project ID, make the redaction obvious enough that readers do not mistake the replacement for interface output.
Version the image with the article. Store the application version, operating system, capture date, and step number beside the source. When the interface changes, the editor can replace the right screenshot rather than guessing whether a difference came from upscaling or a product update.
Ask a second person to follow the step from the published draft. Their first wrong click is useful evidence. It may expose an unreadable label, a crop that hides navigation, or an annotation that points at the wrong control. Fix the instructional failure rather than applying more sharpening to the whole image.
Publish The Honest Version Of The Interface
Keep the source, chosen route, output, and article destination together. If the image was upscaled, say so internally and avoid captions such as “enhanced to reveal” unless the revealed detail was verified elsewhere. The edit should help readers see the layout, not persuade them that uncertain pixels are facts.
The AI Photo Editor is useful when a clean capture needs a larger presentation or a bounded adjustment. PicEditor AI is a poor substitute for reopening the product, reproducing the state, or checking exact UI copy.
Choose the least generative route that remains readable in the real slot. When the screenshot supports a technical claim, fidelity beats apparent sharpness. A reader should follow the instruction without guessing which pixels came from the software and which came from enhancement.